Height of Instrument Method: Levelling Worked Example
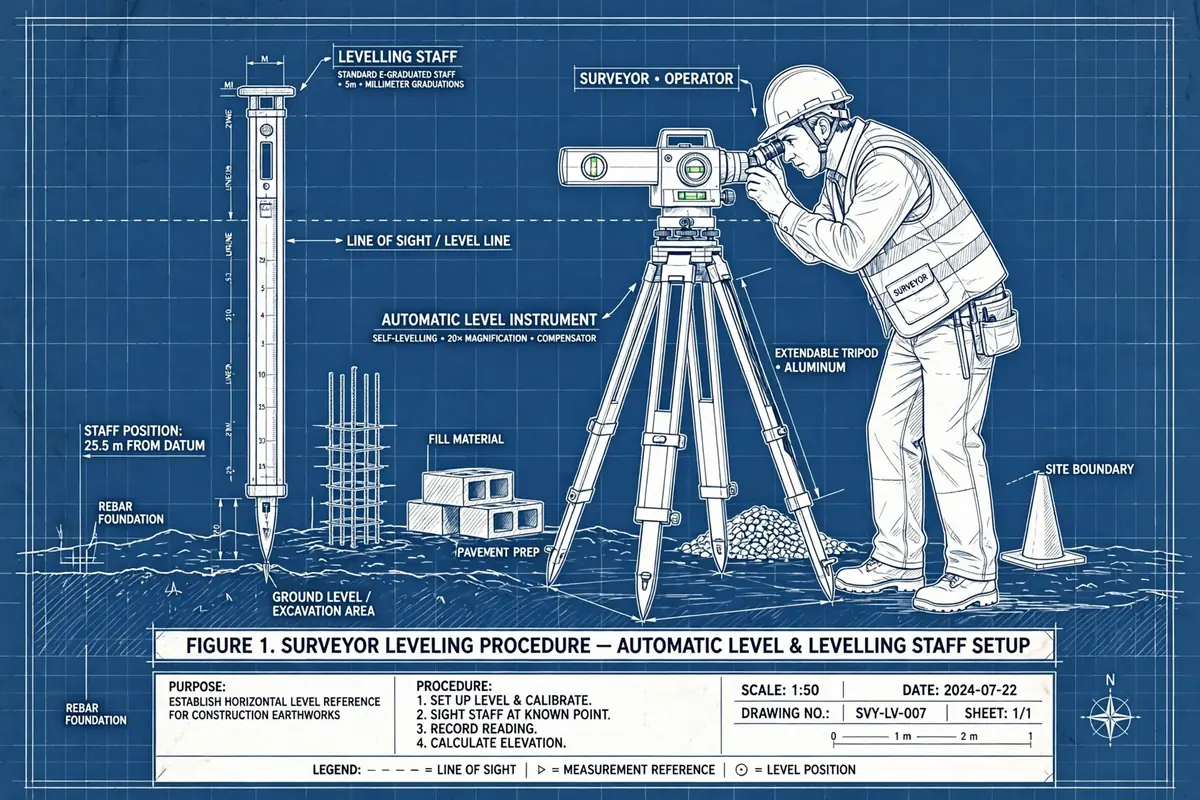
Step-by-step height of instrument method: compute HI from a backsight, reduce staff readings, and check your levelling with a fully worked example.
If you have ever stood behind a level instrument on site and wondered why the surveyor adds one number and then subtracts everything else, you have already met the height of instrument method. It is the quickest way to reduce a levelling run, and it is the method most site engineers reach for when there are plenty of intermediate points to level — setting out a slab, checking formation levels, or running levels along a road centreline. This article explains the method from first principles and works through a complete two-setup example, including the arithmetic check that proves the booking is right.
What the height of instrument actually is
When a level instrument is set up and levelled, its line of sight sweeps out a perfectly horizontal plane. The reduced level of that plane is the height of instrument, usually written HI. It is not the height of the tripod, and it is not the height of the instrument above the ground — it is the level of the line of sight above datum. Once you know the HI, the reduced level of any point is simply the HI minus the staff reading taken on that point, because the staff reading is the vertical distance from the point up to the line of sight.
That gives the two formulas the whole method rests on:
- HI = RL of benchmark + backsight reading
- RL of any point = HI − staff reading on that point
A backsight (BS) is the first reading of a setup, taken on a point of known level — usually a benchmark. A foresight (FS) is the last reading of a setup, taken on a point that will carry the level forward, called a change point. Everything in between is an intermediate sight (IS). The backsight looks backwards to known ground; the foresight looks forwards to the next setup.
Setting up and taking the first backsight
The field procedure is straightforward, but each step protects the accuracy of everything after it. Set the tripod firmly, roughly level the instrument with the foot screws, and let the automatic compensator settle. Then take a backsight on the benchmark, with the staff held vertically on the benchmark point — a staff leaning even slightly reads long, and a long reading gives a low level. Record the reading to the nearest millimetre. Add it to the benchmark's reduced level and you have your first HI. From this moment on, every reading from this setup is reduced by subtraction from that one number.
One habit worth building early: never write a reduced level in the field book without first writing the HI beside it. The HI is the single number the whole setup hangs on, and a wrong HI corrupts every point that follows it, silently, because the arithmetic check at the end only catches booking errors, not a misread backsight.
Worked example: levelling a site with two instrument setups
Suppose you are levelling a small site from a benchmark on a boundary wall with a known reduced level of 100.000 m. You need levels at pegs A and B, and you must carry the level across the site to pegs C and D, which are out of sight of the first setup. The run closes back on the same benchmark as a check.
Setup 1: from the benchmark to the change point
Set up the instrument near the benchmark and take a backsight on it:
- Backsight on BM = 1.845 m
- HI = 100.000 + 1.845 = 101.845 m
Now read the staff at the intermediate points and at the change point, subtracting each reading from the HI:
- Peg A (IS) = 1.210 m → RL = 101.845 − 1.210 = 100.635 m
- Peg B (IS) = 0.985 m → RL = 101.845 − 0.985 = 100.860 m
- Change point CP1 (FS) = 1.620 m → RL = 101.845 − 1.620 = 100.225 m
Notice that peg B, with the smaller staff reading, sits higher than peg A. That is the classic beginner's trap: a bigger staff reading means the ground is lower, because more of the staff sticks up above the point before it meets the line of sight. When a reading goes up, the level goes down.
Setup 2: carrying the level forward
Move the instrument beyond CP1, level it, and take a backsight on CP1 — the same physical point, now with a known level of 100.225 m:
- Backsight on CP1 = 1.305 m
- New HI = 100.225 + 1.305 = 101.530 m
The HI has changed because the instrument is in a new position at a different height. This is the step beginners most often forget: the old HI is dead the moment the instrument moves. Continue with the new HI:
- Peg C (IS) = 0.760 m → RL = 101.530 − 0.760 = 100.770 m
- Peg D (IS) = 1.940 m → RL = 101.530 − 1.940 = 99.590 m
- Benchmark (FS) = 1.530 m → RL = 101.530 − 1.530 = 100.000 m
The run closes back on the benchmark at exactly 100.000 m, the value it started from. That is the field check: closing on a known point and getting the known level back tells you the instrument stayed level, the staff was read correctly, and no setup was disturbed mid-run.
The arithmetic check: proving the booking is right
Levelling books are checked with a simple identity. The sum of the backsights minus the sum of the foresights must equal the last reduced level minus the first reduced level:
- ΣBS = 1.845 + 1.305 = 3.150 m
- ΣFS = 1.620 + 1.530 = 3.150 m
- ΣBS − ΣFS = 3.150 − 3.150 = 0.000 m
- Last RL − first RL = 100.000 − 100.000 = 0.000 m
The two sides agree, so the booking arithmetic is correct. Note what this check does not do: it only verifies the arithmetic, not the fieldwork. If you misread the backsight by 50 mm at the start, the whole run shifts by 50 mm and the check still passes. That is why the closing reading on a known benchmark matters so much — it is the only check on the observations themselves.
A quick site application: checking a slab level
The same method handles the everyday question of whether a poured slab is at the right level. Suppose the design level of a ground slab is 100.300 m and your setup has an HI of 101.845 m, as in setup 1 above. Take a staff reading on the slab surface:
- Staff reading on slab = 1.545 m
- RL of slab = 101.845 − 1.545 = 100.300 m
The slab is exactly on design level. A reading of 1.575 m would have given 100.270 m — 30 mm low — and a reading of 1.515 m would have given 100.330 m, 30 mm high. On site, a quick way to think about it is to compute the target staff reading before you go out: target reading = HI − design level = 101.845 − 100.300 = 1.545 m. Then any reading bigger than the target means low ground, and any reading smaller means high ground.
Height of instrument vs rise and fall
The other standard reduction method is rise and fall, where each pair of consecutive readings is compared and the level rises or falls step by step. Rise and fall checks every intermediate point as it goes, which makes it better for precise work and for spotting a single bad reading. The height of instrument method is faster and the booking is simpler — one subtraction per point — which is why it suits site work with many intermediate sights, such as longitudinal sections and grid levelling. The trade-off is that an error in an intermediate reading is not caught by the arithmetic check, so the method leans on a good closing check. In practice, most site engineers use the height of instrument method for day-to-day setting out and keep rise and fall for precise levelling and for checks that will be relied on later.
Common mistakes to avoid
- Forgetting the new HI after moving the instrument. Every setup has its own HI. Reusing the old one corrupts every level in the new setup.
- Mixing up backsight and foresight at a change point. The foresight of one setup and the backsight of the next are taken on the same point, but they are different readings from different instrument positions.
- Reading the staff upside down. A staff viewed through the telescope appears inverted with older instruments. Read from the correct end, and confirm the reading by checking the metre and decimetre figures against the staff graduations.
- Letting the staff lean. A leaning staff reads long, which makes the point look low. Use a staff bubble, or have the staffman rock the staff gently and take the smallest reading.
- Booking readings in the wrong column. An intermediate sight booked as a foresight ends the setup in the book and starts a phantom new HI. Book the point type at the moment of reading, not from memory afterwards.
- Rounding too early. Carry readings to the millimetre through the whole reduction and only round the final levels.
The height of instrument method rewards tidy fieldwork more than clever mathematics. Set up carefully, keep the staff vertical, book each reading in the right column, compute a fresh HI at every setup, and always close the run on a known point. Do those five things and the method will give you reliable levels all day, whether you are checking one slab or levelling a whole site.
Frequently asked questions
What is the height of instrument in levelling?
The height of instrument is the reduced level of the instrument's horizontal line of sight above datum. It is found by adding the backsight reading to the known reduced level of the benchmark, and every other point in that setup is reduced by subtracting its staff reading from the HI.
How is the height of instrument method different from rise and fall?
The height of instrument method reduces each point directly from one HI per setup, which is faster and simpler to book. Rise and fall compares consecutive readings and checks every point, which is more laborious but catches individual reading errors.
What is the arithmetic check for the height of instrument method?
The sum of backsights minus the sum of foresights must equal the last reduced level minus the first reduced level. If the two sides disagree, there is an arithmetic error in the booking.
Why did my level change after moving the instrument?
Because the HI belongs to one instrument position only. Moving the instrument changes the height of the line of sight, so a new HI must be computed from a backsight on a known point at the new setup.
Calculations and engineering guides are for planning and educational reference. Verify final designs against applicable codes with a licensed Professional Engineer.