Fe415 vs Fe500 vs Fe550 Steel Grades: What Changes in Design
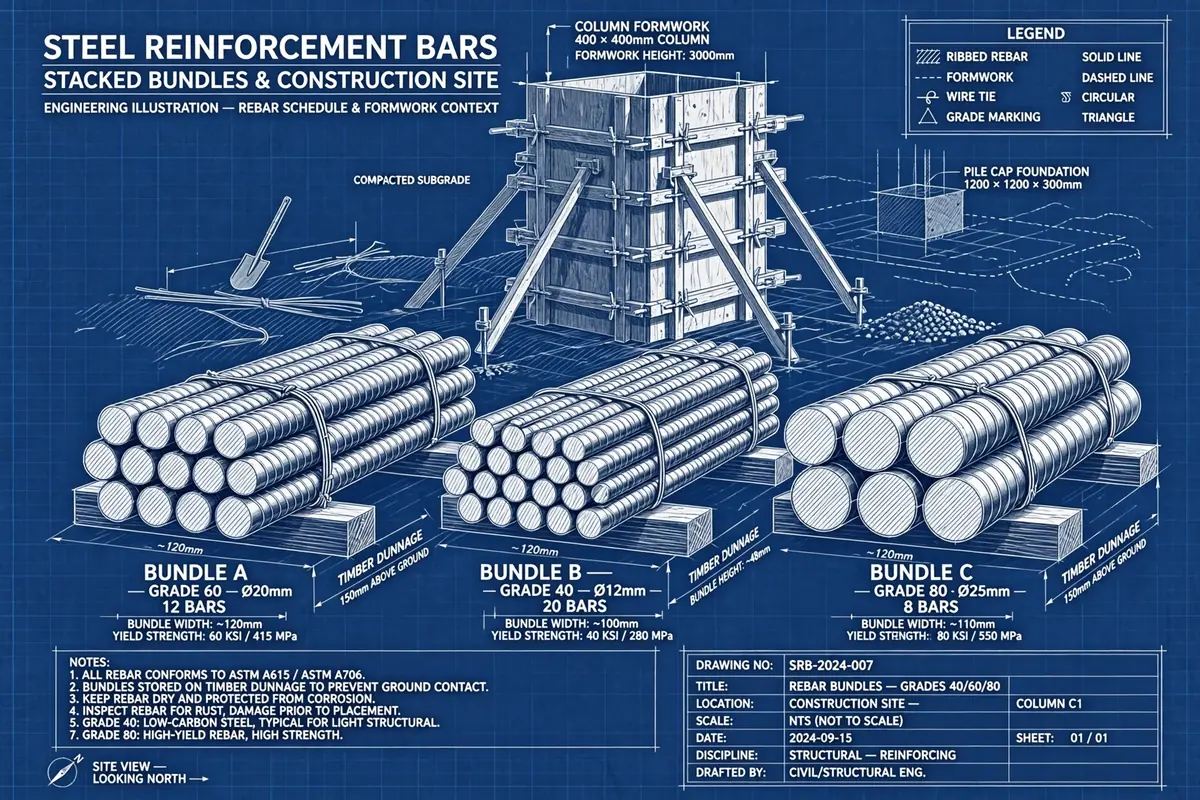
Fe415, Fe500 and Fe550 differ in yield strength, ductility and design rules. See how each grade changes steel area, detailing and cost on site.
Walk onto any reinforcement yard and you will see bundles of bars that look almost identical — same grey steel, same ribs, same lengths. Yet the stamp on the bundle changes everything about how the structure is designed. Fe415, Fe500 and Fe550 are the three reinforcement grades a site engineer meets most often, and choosing between them is not a matter of picking the strongest bar on the shelf. Each grade carries a different yield strength, a different ductility, and a different set of detailing rules. Get the choice wrong and you either waste steel or build in a brittle failure mode you never intended.
This article explains what the numbers actually mean, how each grade changes the steel area a design needs, where the codes restrict their use, and how to make the call on a real project — with a worked beam example so you can see the difference in kilograms, not just in theory.
What the "Fe" Number Actually Means
"Fe" is the chemical symbol for iron, and the number that follows is the characteristic yield strength of the steel in N/mm² (MPa). Fe415 yields at 415 N/mm², Fe500 at 500 N/mm² and Fe550 at 550 N/mm². These are characteristic values, meaning at least 95% of test samples must reach them. The grade is defined in IS 1786 for thermo-mechanically treated (TMT) bars, which is the standard most Indian and Sri Lankan projects specify; equivalent grades appear in other codes, such as Grade 60 (420 MPa) in ACI 318 and B500B in Eurocode 2.
Yield strength is only half the story. A bar must also stretch before it breaks — that stretch is what gives a concrete member its warning before failure. IS 1786 therefore pairs every grade with minimum ductility requirements: a minimum percentage elongation at fracture and a minimum ratio of ultimate tensile strength to yield strength. As yield strength goes up, ductility generally goes down, and that trade-off drives most of the design rules that follow.
Fe415, Fe500 and Fe550 Side by Side
The table below summarises the key properties. Treat the elongation and tensile-to-yield figures as the minimums a certified bar must meet, not as typical mill values, which are usually a little better.
- Fe415: yield strength 415 N/mm², minimum elongation around 14.5%, the most ductile of the three. The traditional choice for general building work, and the most forgiving on site.
- Fe500: yield strength 500 N/mm², minimum elongation around 12%. The workhorse grade of modern construction — about 20% stronger than Fe415, so it cuts steel tonnage noticeably while keeping acceptable ductility.
- Fe500D: the "D" stands for higher ductility. Same 500 N/mm² yield strength as Fe500, but with tighter ductility requirements, making it the preferred grade for seismic zones.
- Fe550: yield strength 550 N/mm², minimum elongation around 10%. The strongest of the three, used where steel congestion is a real problem — heavy columns, thick transfer beams, deep foundations — but its lower ductility limits where codes allow it.
- Fe550D: the ductile variant of Fe550, specified for demanding applications where both high strength and good elongation are needed.
One practical point that surprises juniors: higher grade does not mean a stiffer beam. The modulus of elasticity of all reinforcing steel is 200,000 N/mm² regardless of grade. A beam reinforced with Fe550 deflects exactly as much as the same beam reinforced with Fe415 if the steel area is the same — strength changes, stiffness does not. Deflection and crack-width checks therefore do not get easier just because you upgraded the grade.
How Grade Changes the Steel Area in Design
In limit-state design to IS 456, the area of tension steel in a singly reinforced beam is governed by the equilibrium of the tension force in the steel and the compression force in the concrete. For an under-reinforced section, the required steel area is approximately inversely proportional to the design yield strength of the steel. In plain terms: stronger steel, less of it — but not in exact proportion, because the lever arm and the limiting moment of resistance also shift slightly with grade.
The key formula for the limiting moment of resistance of a singly reinforced rectangular section is:
Mu,lim = 0.36 × fck × b × xu,max × (d − 0.42 × xu,max)
where fck is the characteristic concrete strength, b is the beam width, d is the effective depth, and xu,max is the limiting neutral axis depth. Here is where grade bites: xu,max/d depends on the steel grade. IS 456 gives 0.53 for Fe250, 0.48 for Fe415 and 0.46 for Fe500. A higher grade means a shallower limiting neutral axis, which means a slightly lower limiting moment of resistance for the same section — the section becomes "over-reinforced" sooner. For Fe550, designers generally adopt the Fe500 value of 0.46 or the value from the specific code amendment in force, and the section must be checked carefully against over-reinforcement.
The practical consequence: upgrading grade saves steel in under-reinforced members (slabs, lightly loaded beams), but in heavily loaded members where the section is already near its limiting moment, the saving shrinks and you may need compression steel or a deeper section instead.
Worked Example: The Same Beam in Fe415, Fe500 and Fe550
Take a simply supported beam, 300 mm wide and 500 mm deep overall, effective depth d = 450 mm, concrete grade M20 (fck = 20 N/mm²), carrying a factored bending moment Mu = 150 kN·m. We will find the tension steel area for each grade, using the IS 456 limit-state formula:
Mu = 0.87 × fy × Ast × d × (1 − (Ast × fy) / (b × d × fck))
Solving this quadratic for Ast in each case gives approximately:
- Fe415: Ast ≈ 1,060 mm². Practical choice: 4 bars of 20 mm diameter = 1,256 mm², or 3 bars of 20 mm plus 2 of 16 mm = 1,343 mm².
- Fe500: Ast ≈ 870 mm². Practical choice: 3 bars of 20 mm = 942 mm². That is roughly an 18% saving in steel area against Fe415.
- Fe550: Ast ≈ 790 mm². Practical choice: 4 bars of 16 mm = 804 mm². Roughly a 25% saving against Fe415 — but with the ductility and detailing caveats below.
Now check the limiting moment. For this section, Mu,lim with Fe415 (xu,max/d = 0.48) is about 178 kN·m, and with Fe500 (0.46) about 172 kN·m. Our demand of 150 kN·m sits below both, so the section stays under-reinforced in all three grades and the savings above are real. If the demand had been 175 kN·m, the Fe500 design would have been right at its limit while Fe415 still had headroom — a good illustration of why "stronger steel" does not always mean "more capacity".
Weight check for a 6 m beam: Fe415 at 1,256 mm² weighs about 59 kg of tension steel, while the Fe500 option at 942 mm² weighs about 44 kg. Across a whole building frame, that 15 kg per beam adds up to tonnes — which is exactly why Fe500 dominates modern schedules. But note the trade: the Fe500 beam has fewer, more heavily stressed bars, so crack widths at service load will be slightly wider and anchorage and lap lengths (which scale with bar stress) need care.
Detailing Rules That Change with Grade
Higher yield strength is not free. Several detailing provisions scale with fy, and site engineers must apply them rather than copying a Fe415 detail onto a Fe500 drawing.
- Development and lap length: the design bond stress is divided by the bar stress, so development length Ld = (0.87 × fy × φ) / (4 × τbd). For M20 concrete, τbd is 1.2 N/mm² for plain bars in tension, increased by 60% for deformed bars. The result: a 20 mm Fe500 bar needs about 20% more anchorage length than the same bar in Fe415. Lap lengths scale the same way, and in practice this often wipes out part of the steel saving in short members with many laps.
- Minimum reinforcement: IS 456 sets minimum tension steel for beams at Ast,min = 0.85 × b × d / fy. A higher grade actually lowers the minimum area — 0.51% for Fe415 versus 0.42% for Fe500 at the same section — but this minimum governs lightly loaded members, so it rarely drives the design.
- Maximum reinforcement: capped at 4% of the gross cross-sectional area for beams and columns regardless of grade. High-grade steel reaches this cap with fewer bars, which helps congestion but makes the section harder to compact.
- Spacing and crack control: because Fe500 and Fe550 bars work at higher stress, crack widths grow for the same steel area. IS 456 crack-width checks and the maximum bar spacing rules in beams and slabs become more critical, and in water-retaining or exposed structures the designer may keep Fe415 precisely for crack control.
- Bend and hook dimensions: the minimum bend radius and the anchorage value of standard hooks and bends are specified in IS 2502 and BS 8666 shape codes, and high-strength bars are more prone to cracking at tight bends. Site teams should never bend Fe550 bars to a radius meant for Fe415, and rebending a high-grade bar on site is asking for a fracture.
Seismic Zones: Where Grade Choice Is Restricted
In earthquake-resistant design to IS 13920, ductility is not optional — it is the whole strategy. The code requires reinforcement with adequate elongation and a guaranteed tensile-to-yield ratio, which is why Fe500D and Fe550D exist. Ordinary Fe550 is generally not permitted for the primary seismic-force-resisting elements in higher seismic zones, and many project specifications simply ban Fe550 in ductile frames altogether.
The rule of thumb for seismic work: use Fe415 or Fe500D for beams, columns and shear walls in seismic zones III, IV and V, and reserve Fe550D for elements where its high strength is genuinely needed and its ductility is certified. If a drawing specifies a "D" grade, do not substitute the non-D equivalent — the letter is the ductility guarantee, and the substitution is a structural change, not a like-for-like swap.
Cost, Weight and Site Handling
Per tonne, Fe500 and Fe550 cost slightly more than Fe415 — typically a few percent, since the alloying and thermo-mechanical treatment cost more. But per structure, Fe500 usually wins: an 18–20% reduction in tonnage outweighs a small per-tonne premium, and fewer bars mean less fixing labour and less congestion at beam-column joints. Fe550 can win further on tonnage in heavy members, but the saving narrows once longer laps and stricter detailing are counted.
On site, the grades need different handling. High-grade TMT bars must not be welded casually — welding alters the hardened outer layer that gives TMT its strength, so welded splices need an approved procedure and are often prohibited in favour of laps or mechanical couplers. Bars must also be stored off the ground, protected from standing water, and checked at delivery: the bundle tag, the manufacturer's test certificate, and the rib pattern and grade marking rolled onto the bar itself should all agree. A mismatch between the delivery note and the drawing grade is a hold point, not a paperwork detail.
How to Choose: A Practical Decision Guide
- General residential and commercial frames: Fe500 (or Fe500D in seismic zones) is the default. It balances strength, ductility, availability and cost, and every detailer knows its rules.
- Lightly loaded members, slabs, and crack-sensitive structures: Fe415 remains a sound choice. Its extra ductility gives wider warning before failure and tighter crack control, and the steel saving from upgrading is small when minimum reinforcement governs anyway.
- Heavily loaded columns, transfer beams and deep foundations: consider Fe550 or Fe550D where congestion is a real problem — when 4% steel with Fe500 still will not fit or cannot be compacted. Check the limiting moment and the seismic restrictions first.
- Seismic zones: Fe500D as the standard, Fe550D only where certified and explicitly permitted by the project specification.
- Never mix grades in the same member without a design check: lap and anchorage lengths, minimum steel and crack checks all assume one grade. If a substitution is proposed on site, it needs the designer's written approval, not a verbal okay.
Common Mistakes Site Engineers Make
- Assuming stronger is always better: upgrading a beam from Fe415 to Fe550 without rechecking the limiting moment can push the section into over-reinforced territory, where concrete crushes before the steel yields — a sudden, brittle failure with no warning.
- Copying lap lengths across grades: a lap that worked for Fe415 is too short for Fe500 by about a fifth. Short laps are one of the most common causes of splice failure in site audits.
- Ignoring the "D": substituting Fe500 for Fe500D in a seismic frame removes the ductility margin the earthquake design relies on.
- Bending and rebending high-grade bars: Fe550 bars cracked at a site bend are a recurring non-conformance. Bend once, to the specified radius, and reject bars that have been straightened and rebent.
- Forgetting deflection: because stiffness does not change with grade, a Fe550 beam sized for strength alone can still fail its deflection check. Always run the serviceability checks after any grade change.
Frequently Asked Questions
Can Fe500 replace Fe415 one-for-one on site?
No. The steel area, lap lengths and anchorage lengths all change, and the section must be rechecked for its limiting moment and deflection. A grade substitution is a design change that needs the structural engineer's approval.
Is Fe550 better than Fe500?
It is stronger, but not universally better. It saves more steel in heavy members, yet its lower ductility restricts its use in seismic design and its detailing demands are stricter. Fe500 remains the better all-round grade for most buildings.
What does the "D" in Fe500D mean?
Higher ductility — a guaranteed minimum elongation and tensile-to-yield ratio above the standard grade. It is the grade specified for earthquake-resistant construction under IS 13920.
Does a higher grade reduce the number of bars?
Usually yes, because the required steel area drops. But fewer bars mean each bar carries more load, so spacing, crack width and anchorage all need checking, and in congested joints the saving can be partly offset by longer laps.
How do I verify the grade of bars delivered to site?
Check the bundle tag and the mill test certificate against the drawing, and look for the grade marking rolled into the bar itself. If any of the three disagree, quarantine the bundle and raise it with the engineer before fixing.
Calculations and engineering guides are for planning and educational reference. Verify final designs against applicable codes with a licensed Professional Engineer.